Sunday, October 27, 2013

Chickpea dumpling soup

Kale season. I do love my kale and don't even need an excuse to buy it anymore. If it's stocked in the produce aisle, one or two bunches go straight into my kart.

This is a modification of a recipe that I make quite regularly, since I was gifted Homestyle Vegetarian (published by Murdoch Books) for Valentine's Day back in 2009. It's definitely homestyle but has a little bit of kick with some cumin, coriander and chili. This rather simple tomato soup is transformed into a hearty fall meal when chick peas, chick pea dumplings and kale are added.

Another great thing about this recipe, is that you can make it out of basically what you already have in the pantry. I always have flour, onion, garlic, canned tomatoes and various canned and dry beans in my pantry. The addition of anything fresh and a little grated Parmesan go a long way into making this soup presentable for guests as well.

Ingredients: 
olive oil
1 onion, chopped
2 garlic cloves, diced
cumin, coriander and chili to taste
vegetable bullion
3 cups cooked chick peas
2 cans tomatoes
1 cup of flour
2 tsp baking soda
1 tsp salt
30g cold butter
4 tbs grated parmesan
3 tbs mixed herbs province
3 tbs milk
Optional: Bunch of kale, chopped

Soften the onion, garlic and spices in the olive oil in a saucepan. This should take only a few minutes. You can add the kale and wilt it at this point. Add the chick peas, tomatoes, veggie bullion and 3 cups of water and bring to a boil.

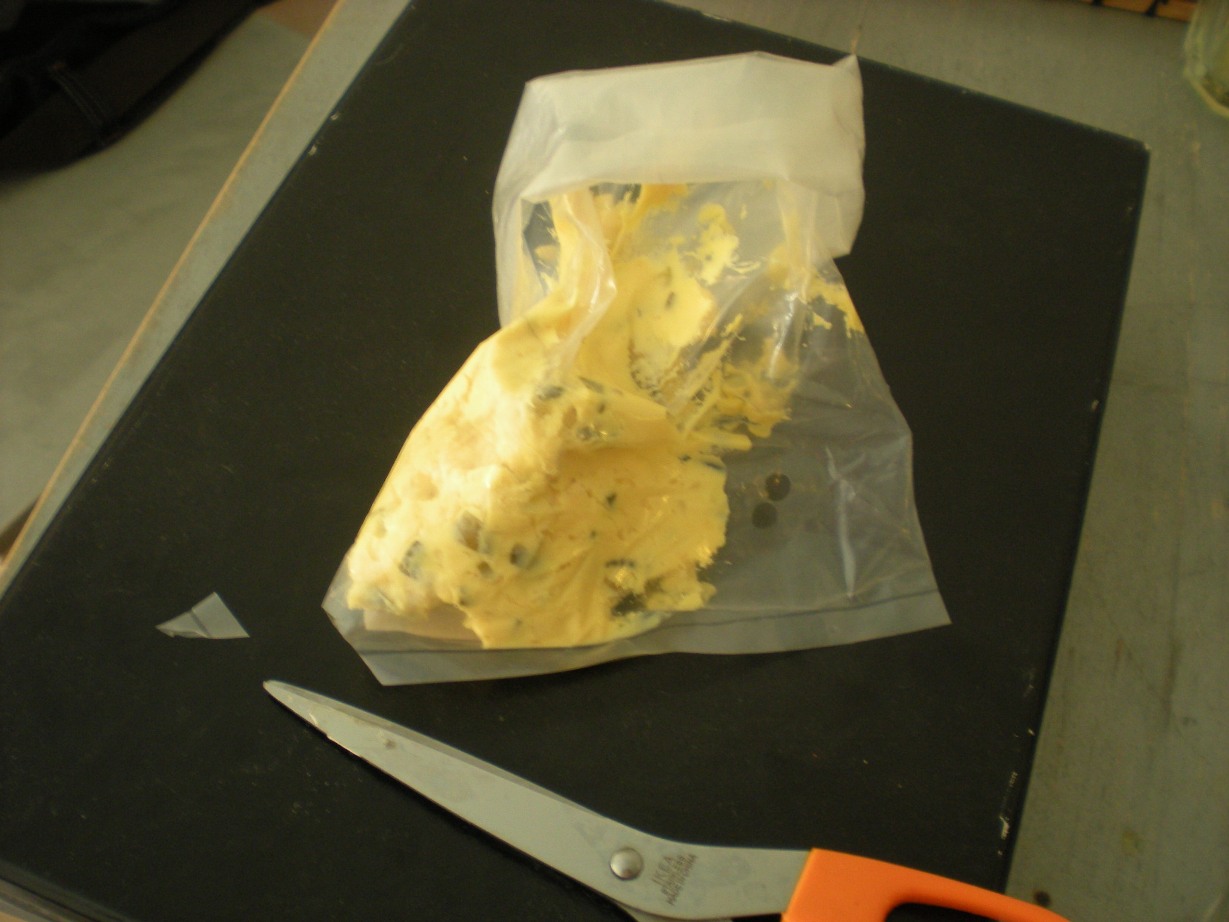
While the broth is heating, make the dumplings. Mix the flour, baking soda and salt together in a large bowl. Cut the butter into cubes and mix together in the dry ingredients with your hands until there is a coarse crumble. Mix the herbs and the Parmesan. Finally, mix in the milk lightly enough to combine the dumpling dough. With your hands, shape the dumplings into small balls, keeping in mind that they will double in size once boiled.

Add the dumplings to the soup to boil for about 5 minutes until puffed. Serve immediately.

Tip: Only add the dumplings you want to eat in that serving and spare the other uncooked dumplings for later. Re-cooked dumplings can turn to mush if boiled multiple times.


Wednesday, September 11, 2013

Megzican's Black Bean Soup


While it wasn't too long since I was in Mexico for the first time (in May), I miss it already. The quest for the perfect fish tacos brought us to a lot of great digs all around Tulum. We had our fair share of ceviche, calamare, camarones, tacos, empanadas, not to mention salsa. A lot of very spicy salsa.

This soup is just the protein you need. And because black beans help regulate your body's glucose levels, your metabolism will be working as hard as you are. If your transition from summer to fall goes from 0 to 60 in the blink of an eye (like mine), you'll be glad for the extra energy. And this recipe is a fast cook, if you're short on time.

You can make this from canned black beans, which will result in a creamier texture. I chose to use the rest of my dried beans, which meant that I decided to make this soup a day in advance, so that I had time to soak the beans over night, rinse them, and set them boiling an hour before I threw in the other ingredients. Yep, I just threw 'em in. Also, feel free to use ground pork, chopped ham cold-cuts, etc. I used sausage because it was leftover from a bbq season... sniff..

Easy Black Bean Soup
2 cans or 1 cup dried black beans, soaked and cooked
1-2 pork sausages, chopped
1 large onion, chopped
3 cloves garlic, diced
1 carrot, chopped
chicken bouillon cube, oregano, cumin and chili, spiced to taste.

If you feel like fussing a little more, sauteing the onions, garlic and spices in a little olive oil before adding them to the beans, feel free. It will soften the flavour of the garlic, and release the aroma of the spices. If you don't, that's fine too. Boil all ingredients together until the carrot is softened, and then using a hand blender, blend all ingredients together.

Squeeze some lime juice and garnish with an avocado. Serve hot or room temperature.

This soup serves 6, or one greedy chick 3 days worth of cholesterol lowering, gut satisfying soup to keep me going. Perfect for a gal on a budget, too. Yep, I spent all my pesos and Mexico and don't regret it for a minute. I think after this post I'll go for a run and start getting in shape for my next Mexican holiday.

Side note: Lacking a submersion blender, I decided to wait for the soup to cool a bit and then pour it into the regular blender. Ooops, the liquid was still too hot, resulting in a crack down the side of my glass blender. Truly devastating for me, as my precious Kenwood Robot Culinaire is one of my only prized earthly possessions...(along with my Nikon and my passport). A true sign that smoothie making season is just about over for a while....

Wednesday, July 31, 2013

Spinach Crepes with Mushroom and Ricotta


A little short on Magnesium? You may feel generally fatigued, and think it's from all the partying you've been doing this festival season. You may feel bloated and blame the beer. But hey, let's not get caught up in the blame game, because we both know that there is one whole month of Summer left and the show must go on!

I'm going out on a limb here and suggesting that a little bit of nutritiously fortified feed will go a long way into putting that spring back into your step so that you don't miss another spontaneous moment of fun while the sun's a-shinin'. Spinach is full of good stuff, such as magnesium, Vitamins A,C, E, K.... This little recipe should get you started. For other recipes packed full of spinach goodness, check out these other recipes.

Crepes are fun because they sound fancy, but they're really as basic as it gets. These are green because the spinach goes right into them. Pretty.

Spinach Crepes
1 bunch of spinach (about 300 grams)
1.5 cups of milk
3 eggs
3 tablespoons olive oil + more for the frying
1 tbs marjoram
1 cup flour

Cook the spinach until wilted in a pan on medium heat with a pinch of salt. Mix in with the wet ingredients in a food processor and blend until a nice green color is throughout. Slowly add the flour.

Ricotta Filling
1 cup ricotta
1/2 cup grated parmesan
1 tbs marjoram
some chopped spring onion, greens only
salt and pepper to taste

Mushroom Filling
2 tbs olive oil
1 small spring onion, whites only, chopped
1/4 cup white wine vinegar
1/4 cup of cream or sour cream

In a saucepan, heat the olive oil and sautee the onions until transparent. Add the mushrooms and wilt (if fresh. I used canned so there wasn't much need for the cooking). Whisk in the wine wine vinegar and cream and remove from heat almost immediately.

Eat these crepes with either filling or both. Surprisingly filling and it'll keep you going for a long time. Now get outside and get some sunshine.

Monday, July 22, 2013

Coconut & Peanut Chicken with Avocado Salad

Though I have a million excuses why I haven't been blogging lately, I won't bore you with any of them. In general, I don't like excuses anyway. They're as bad a habit as starting out everything with an apology. Therefore, I won't make either.

What I will make, however, is some fully roasted chicken, with a thai inspired sauce that combines some of my favorite things: spicy chili, coconut and PEANUT BUTTER! And then of course pair it with another one of my favorite things: AVOCADO. Yes, these fat-laden foods are some of my favorite things (next time I'll try to incorporate some of the bacon fat I've been rendering and storing in my fridge.) This chicken could also be served with a few other Thai inspired side dishes, like Stir Fried Garlic Bean Sprouts and Shrimp or Wilted Bok Choy with Cashews.

I bought a whole 'old chicken' from the Asian store down the street. What does it mean, 'old chicken'? Your guess is as good as mine. It did have some remaining hairs on its skin and I even had to pluck off a few of the feathers once it had defrosted. Kinda gross, I know, but people have been doing this forever and ever, and I figured it couldn't be worse for you than eating any other part of the bird, so let's not split hairs here. I prepared the bird as recommended, about 15 minutes at 220C and then another 50 or so at 190C, breast side down, uncovered.

Thai sauces always have a lot of ingredients, but they're repeated in so many of the dishes that they're worth it to have around if you make enough Thai food. The pastes typically last months in the fridge.
Here's the list:

Chili, Coconut & Peanut Sauce

1/4 cup of vegetable oil
1/4 cup of sweet chili sauce (I substituted papaya jam)
1 tbs saracha (chili paste) or to your liking
1/2 cup shredded coconut
1/2 cup peanut butter
1 tbs soy sauce
1 tbs shrimp paste
1 tbs fish sauce


Toast the coconut - I put mine in a small teflon coated pan and cooked on high heat without any oils added until it browned a bit and smelled great. Add the rest of the ingredients, tasting and modifying as you go along.


Avocado Salad: 
2 avocados, chopped
2 limes, juiced
1 spring onion, greens parts only, diced
2 tbs tamarind past (or 1/4 cup tamarind water)
1 tsp sugar
1 tsp fish sauce
1 tsp vegetable oil
crushed cilantro
dash of saracha if you like it

Toss all the liquid ingredients and the sugar and cilantro together. Fold in the chopped avocado delicately, so as not to mash them too much.

I also threw together a little mango salad for something sweet:

Mango Salad: 
1 mango, diced
1 small red onion, diced
1 tsp fresh ginger, grated
cilantro
sugar
saracha
fish sauce

Toss these together in a bowl, adding the last 4 ingredients incrementally to taste. That simple.

Serve the chicken and the salads with a little steamed rice and enjoy.

Now, for my own reference for the future, and perhaps little helpful hints for you:

1. Chicken is not blow fish, it's not as dangerous as all the bird-flu hype has it out to be, and doesn't need to be charred inside and out for it to be safe to eat. I cooked mine 15 min at 220C and then flipped it to give it a nice bronze on both sides before I turned the heat down, resulting in a slightly dry bird. I will TRUST the chicken roasting instructions AND the meat thermometer next time.

2. Fresh cilantro beats the hell out of the jarred preserved kind (that I used, because I didn't have time to go to the store on Sunday). For guests, I will get my butt into the store for the fresh herbs. (my potted cilantro died while I was in Kenya.)


Friday, July 1, 2011

Brioche with Nectarine


Last night, the restaurant where I am currently working full time, Chez Dominique, had a lot of leftover brioche bread. What a pity, so sad to waste such a delicately perfected creation. So of course I had to take some home with me and it wasn't difficult to find some delicious ways to use it straight away for breakfast the next morning. 

Brioche is a french bread and the famous 'cake' referred to when Marie Antoinette declared 'Qu'ils mangent de la brioche' (let them eat cake) about the protests coming from the malnuorished and hungry masses. Because brioche is made with a lot of butter and sometimes eggs, it very easily crumbles and is very delicate, but very delicious. I myself have made several unsuccessful attempts at this bread, but perhaps in my next attempt I'll take tips from our in house baker. (Blog on this coming later)

Since I had some perfectly ripe nectarines, I decided to make a light syrup with them, putting a quarter cup of sugar and an eighth of a cup of water and a pinch of nutmeg to a small sauce pan and let boil. I added the slices of nectarine, skins and all, and let them soften.

Then I simply cut some of the brioche lightly in half. I was so glad about my recent purchase of a Fiskars knife set on sale, 50% off. 5 Pro series Fiskars knives for 25e. Now I finally have the perfect bread knife.


I toasted these lightly in our toaster oven. Using a regular toaster would have been disasterous because it would have squished them and then you would not have been able to get the pieces out. You would be left with brioche crumbs in the bottom of the toaster, burning, and nothing more. You can also use the regular oven's broiler for a few minutes.

Finally, I topped the brioche with the nectarine and syrup and served with some plain turkish yogurt on the side. Perfect breakfast food to share with A before he jets off to work.

Monday, June 27, 2011

Chorizo and Shrimp Stew

I love when I have an unusual ingredient that I want to make into something new and different (to me at least). After I'd made the traditional paella from the chorizo I brought home with me from Barcelona, I still had some left and wanted something delicious to make with it. Among the many good ideas was this stew, which I adapted from foodandwine.com. 
The ingredients were simple, some olive oil, onion, garlic, frozen shrimp, a few roasted red bell peppers (this time I used those from a jar and didn't roast them myself), crushed tomatoes that serves as the base of the stew and of course, chorizo. 

Start by thinly slicing the chorizo and dicing the onion and garlic. First add the chorizo to a deep heavy coated stew pan with a drizzle of olive oil (the chorizo will not need a lot of added fat to cook, as it has plenty of its own). Stir in the heat until sizzling. The sides of the chorizo slices will curl up and become very fragrant.
Remove the chorizo from the pot, leaving the oils in the bottom. Set the chorizo aside with the shrimp for later.
Next, soften the onion and garlic in the pot. You may also use sliced or diced carrots. Once soft, you may add a tablespoon of flour to the mixture and stir until yellowed and bubbling if you wish to thicken this into a stew. Then add the crushed tomatoes, sweet roasted red peppers (about 2), and a few cups of water and bring to a boil. At this point, I made the texture of the stew smoother by using a few short pulses with my hand blender. Lastly, add the shrimp and chorizo and cook for a few more minutes.

Serve with fresh slices of avocado and enjoy.

Friday, June 24, 2011

Deviled Eggs

This super budget-friendly appetizer is easy to make and fits in well for get togethers and occassions. I've made several batches of these in the last couple months, once for a big dinner we hosted for Easter and another time for a Partylite party at a friend's from school. Both times they went over really well, and were gone in a flash. Good to make more than you think you'll need. 

 Start by boiling your eggs. I used an entire box, which in Finland is 10 eggs (not a full dozen- I still haven't quite accepted that). Everyone has different methods. I have adopted a method for this to avoid over cooking. That it, place the eggs in a really large pan so that all of the eggs are distributed equally, cover with water and a pinch of salt. Bring to a boil over high heat, but as soon as a boil has been reached, turn off the stove and cover pot with a lid and let sit for 8 minutes. With an electric stove, I even take the pot off the burner, since the range is still hot even having turned it off.


Place the yolks into a large bowl and add equal parts of mayonaise, sour cream (creme fraiche) and then a little pickle relish, cream cheese, and mustard to taste. Stir and mash together as you go and you will see if you need to add more to soften the mixture. This will depend a lot on your own preferences, as well as the consistency of the yolk after you've boiled the eggs.


Once the filling mixture has been mashed and mixed and tastes to your preference (this recipe is really loose because everyone like them a different way), scoop the mixture into a clean bag with a pointed end. Cut off a small tip of the corner of the bag, just enough to pipe the filling neatly into your egg white halves. (Note: You can skip this step all together if you'd rather just spoon the mixture into the egg whites, but it will be considerably messier.)

Then, you will squeeze the mixture into the egg white halves for the final product. Easy. I like to dust mine with paprika the way my mom always did it, to add a little color. And there you have it. The whole process takes less than half an hour, and costs less than 3 euro to make, so cheap fast and easy. Enjoy.

Tuesday, June 21, 2011

Chicken Chorizon Paella

Any time I've ever made paella in the past, I've felt slightly lacking in authenticity due to the lack of chorizo in the recipe. Though I was not eating meat back then, and I have made paella with soy 'chorizo', the taste was obviously lacking something. I keep comparing my paella to that of the well known paella at Taberna del Alabardero, where I worked one summer in 2006. Well finally A and I took a holiday to Barcelona. I can't believe it took me so long after living in Europe to make it to the country of my second language! We had a great time and ate out and enjoyed parks and seaside views and I didn't leave without buying some chorizo to take home with me.

What's great about chorizo, and much like all of the different types of cured ham you can find in Spain, the curing process allows the meat to stay good for quite a long time, even at room temperature. So taking it home was entirely possible and safe. Paella is such an easy recipe to make. Especially since it's really a one dish recipe. You can cook everything in the same deep pan.

This large stick of chorizo 'picante' cost only 3,45e.
Start with onion and bell peppers and fry them in some olive oil. 

 Add the chicken and diced chorizo and cook for a few minutes. Add a cup of porridge rice to two cups of water, or as much rice and water as you can fit in your pan, with a 1:2 ratio. It depends a lot on how many servings you want. You can also use normal long grain rice or brown rice, but keep in mind that it takes longer to cook. Add peas and stir in salt or other flavorings. I used one cube of chicken stock and some chilli pepper. Saffron would also make this dish even more authentic. Alas, I didn't have any.
Cover and don't lift the lid for about 20 minutes, or as long as the rice package indicates. 

The result is a colorful, nutritious and filling dish that everyone will like. I enjoyed my paella out on our balcony on the picnic table :)  Now I'll have to come up with something new to make to use up the rest of the chorizo.

Monday, April 18, 2011

As it is.

I could go on a political rant today, seeing as the Finnish parliamentary elections were concluded yesterday, and the results aren't exactly promising for a brighter future for Finland. The true Finns quadrupled their representation in parliament, which means that they will be taking ministerial positions, actively representing Finland in international politics. Some of their stances will be holding out funds for the Portugal bailout, restricting immigration rights, and possibly even an EU pull out all together. This isn't a blog about political rants though, so before I get upset and start telling you about the True Finns party's plans for 'culture' and 'education', I'll go switch it up a little...

The world revolves because every living being things that he is the Lord and creator of the material world. Material consciousness has two psychic divisions. One is that I am the creator and the other is that I am the enjoyer, but neither is the creator nor the enjoyer but a cooperator..... For instance, part of a machine cooperates with the whole machine a part of the body cooperates with the whole body. The hands, legs, eyes and so on are all parts of the body, but they are not actually the enjoyers. The stomach is the enjoyer. The legs move, the hands supply food, the teeth chew and all parts of the body are engaged in satisfying the stomach because the stomach is the principal factor that nourishes the bodys organisations. Therefore everything is given to the stomach. One nourishes the tree by watering its root and one nourishes the body by feeding the stomach, for if the body is to be kept in a healthy state,m the the parts of the body must cooperate to feed the stomach.... and we, as subordinate living beings, are meant to cooperate... The cooperation will actually help us just as food taken by the stomach will help all other parts of the body. If the fingers of the hand thing that they should take the food themselves instead of giving it to the stomach, then they will be frustrated. By cooperation they enjoy.
-Bhagavad Gita

What is the message here?

Friday, April 15, 2011

Thai Marinated Beef with Mixed Greens and Mango Salad

Ever since I got the cookbook 'Travels with Thai Food' by the authors of 'Spirit House,' I've been wanting to try new combinations and recipes (Thanks Ms. P!) I rarely cook by the book, but when entering unchartered territory, such as this, it's really handy to have such a comprehensive guide (and such lovely pictures).  After pouring over the book with A one night, we settled on this recipe for dinner and I went on the hunt for the grocery list.

The beef can be a fillet or any other decent quality beef. But it should be marinated a day in advance if possible. The marinade calls for: lemongrass (bruised and chopped), a large chilli, coriander, kaffir lime leaves, lime juice from one lime, galangal, ginger, sesame oil, sugar, and fish sauce. I cheat a little because I have a pre-made Thai paste that has most of the aforementioned ingredients. I would love to have lemongrass and galangal fresh, but I just wouldn't use it fast enough- and I hate to waste anything. (Lemongrass freezes just fine- though I don't have a freezer). I just added some lime juice, the oil and fish sauce and covered the beef and set it in the refrigerator.

The salad called for a variety of things that can only be found at the asian markets. Luckily, there are several in Hakaniemi and they are very close together. As it calls for a green and a ripe mango, coriander, mint and basil, watercress, garlic and lime, quite a few fresh ingredients were needed. I used Thai mint basil, rather than buy mint and basil separately (those cross breeds come in handy!) 

Watercress is a perky little green bunched into uneven sprigs, highly aromatic (though I can't quite put a finger on the scent, but it just reminds me of an Asian restaurant). I roughly pulled the leaves from the bulkier stems and put them in a strainer for a rinsing. I wasn't too meticulous however about some stems left on, as I felt this gave the base of the salad some nice crunchy bulk.
Green and ripe mango
Thai mint basil
I was a little shocked to find such a large pit in the mangoes. For some reason, I remembered more flesh. The green mango was especially hard, but it made it easier to peel and julienne. After all the greens had been torn and washed and tossed, I added the mango strips. 

 A made the tamarind dressing by chopping a few cloves of garlic, a large red chili, and a teaspoon of sugar and crushing them in a pestle and mortar, adding a tablespoond of fish sauce, 2 tablespoons of lime juice, a tablespoon of tamarind and a splash of water. Since this is rather spicy at the end, a little goes a long way, but it's definitely worth the effort.

I loved this meal, it was light and had such a variety of tastes mixed together. It might take some accustoming to the uninitiated, but basil/mint/coriander/lemongrass/spicy.....yummmm.